Upgrading an Aging EPR Spectrometer Extending System Life Without a New Magnet
You Can Extend System Life Without Replacing the Magnet
If your aging EPR spectrometer is 10, 15, or even 20 years old, a full system replacement is often unnecessary.
In many U.S. laboratories, the magnet remains stable and reliable, while performance limitations come from outdated electronics, probes, and software.
By performing a practical EPR spectrometer upgrade, laboratories can restore performance, modernize workflows, and control costs. This approach has already been implemented in real projects and is proving to be both cost-effective and efficient.
Why the Magnet Is Usually Not the Limiting Factor
Magnets are designed for long-term operation and often remain stable for decades with proper care.
In most cases, the magnet provides:
-
Stable magnetic field strength
-
Acceptable field homogeneity
-
Reliable day-to-day operation
The main limitations come from other parts of the system that age faster, such as electronics, control units, and software. This is why many laboratories choose to upgrade their EPR spectrometer without replacing the magnet, focusing on electronics and controls instead of full replacement.
Common Problems with Aging EPR Systems in U.S. Labs
These challenges are common in an aging EPR spectrometer that has been in use for many years.
- Reduced Signal Quality
A lower signal-to-noise ratio makes weak signals harder to detect and increases experiment time.
- Outdated Software and User Interfaces
Legacy software may not run smoothly on modern operating systems and lacks automation features that labs now expect.
- Increasing Maintenance Pressure
Replacement parts are harder to source, and service visits take longer and cost more.
- Limited Support for Modern Experiments
Advanced experiments often require improved timing control, better signal processing, and more flexible system configuration.
These issues typically point to outdated electronics and controls rather than the magnet itself.
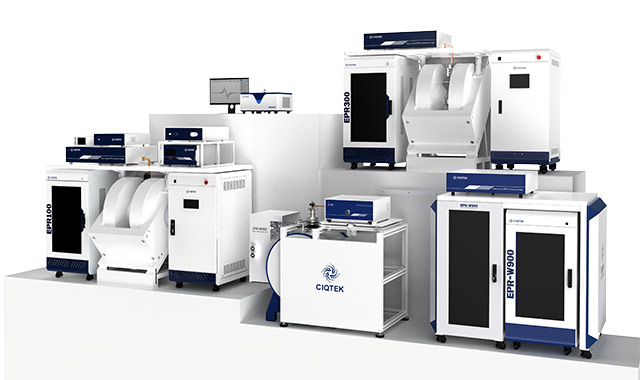
What Can Be Upgraded in an EPR Spectrometer
A modern EPR system upgrade focuses on components that limit performance rather than replacing the entire instrument.
- Console and Control Electronics
Upgrading the console improves stability, acquisition speed, and compatibility with modern computers. This is often the most impactful step in the upgrade old EPR spectrometer workflow.
- Microwave Electronics and Detection Chain
Modern microwave electronics reduce noise and improve signal stability, resulting in clearer and more reliable spectra.
- Probes and Resonators
New probe designs can significantly improve sensitivity and ease of use, especially for routine measurements.
- Software and Automation
Updated software simplifies daily workflows, supports automated experiments, and makes the system easier to operate for students and shared facilities.
Upgrade Versus Buying a New System
For many laboratories, upgrading is a practical alternative to full system replacement.
With an EPR system upgrade, labs can:
-
Keep a functioning magnet
-
Reduce capital investment
-
Shorten downtime
-
Minimize disruption to ongoing research
When the magnet remains stable, an EPR upgrade without replacing the magnet often delivers most of the benefits of a new system at a fraction of the cost. This approach is a cost-effective EPR upgrade that many U.S. laboratories are now choosing.
A Real EPR Modernization Case from CIQTEK
A real example comes from Queen Mary University of London, where CIQTEK completed an official EPR spectrometer modernization service.
The laboratory was operating an aging EPR spectrometer that no longer met current research needs. While the magnet was stable, outdated control electronics and system modules limited performance and usability.
Instead of replacing the entire system, the laboratory chose CIQTEK EPR modernization and upgrade service. CIQTEK completed on-site installation, optimized the system, and provided user training.
After the upgrade:
-
System stability improved
-
Daily operation became more efficient
-
The laboratory extended the usable life of its EPR system
-
The high cost and disruption of full replacement were avoided
This demonstrates that upgrading a legacy EPR system is already being implemented successfully in active research environments.
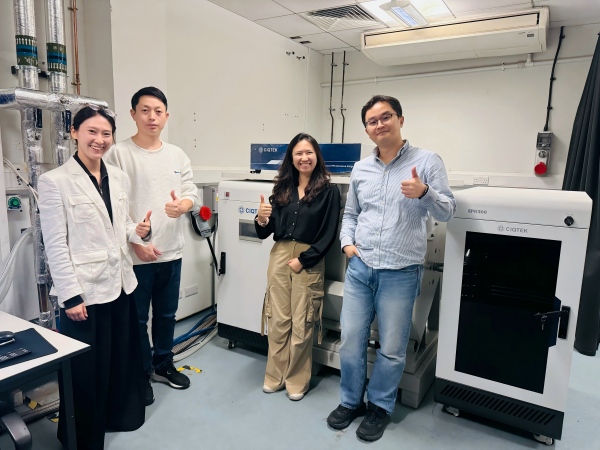 CIQTEK completed the EPR spectrometer modernization service at Queen Mary University of London
Why CIQTEK EPR Upgrades Are Cost-Effective
Budget planning is a critical concern for U.S. laboratories. CIQTEK EPR upgrade service is designed to be cost-effective by focusing on performance-limiting components rather than replacing the entire instrument.
Each upgrade is evaluated based on the existing system's condition, ensuring that resources are used efficiently. This makes the service a truly cost-effective EPR upgrade for labs looking to extend the life of their instruments.
How Long Does an EPR Upgrade Take
Compared with full system replacement, EPR upgrades typically require much less downtime.
-
Hardware preparation is done in advance
-
On-site installation and system validation are efficient
-
User training is included
This allows labs to resume experiments quickly and maintain research continuity.
Moving Forward
If your aging EPR spectrometer still has a reliable magnet but does not meet modern research needs, a cost-effective EPR upgrade is a practical solution.
CIQTEK EPR modernization and upgrade service helps laboratories extend system life, improve performance, and protect research budgets while minimizing disruption. For many U.S. EPR users, upgrading is not a compromise but a smart, strategic decision.
Learn more about CIQTEK EPR modernization and upgrade service
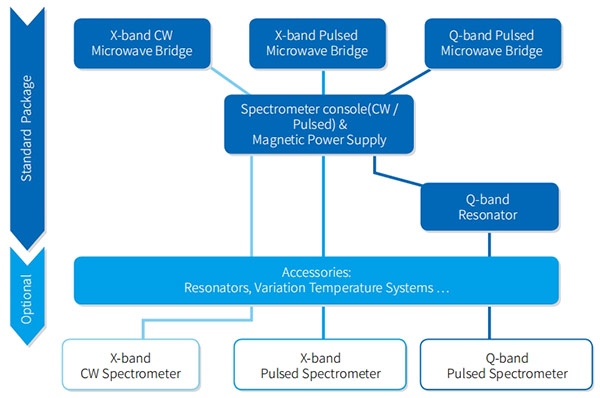 CIQTEK EPR Upgrade Workflow